
Currently we are out of home the most part of the time, and I became to investigate how to control the printer remotely, and the best option for me is Octoprint.
What do I need?
The first thing is to have an internet connection at home 🙂
Another thing that you need id aRaspberry Pi, because we will install Octoprint on it, another good thing is to buy a camera to receive visual information from the printer.
Raspberry Pi and Octoprint
Raspberry Pi is an amazin mini computer, I have bought 3b model, but this week a new model has been released. With the mainboard I also bought one pack with the power adapter and a box, and the IR camera in order to watch the printings on the night. You can buy the camera and power adpapter on AliExpree if you want to save some money and the time is not a problem for you.
When you have all this stuff you also need a microSD card for the raspberry OS, the best chioce is one class 10 card.
Where can I download Octoprint and how to install it?
You can download it here. Once downloaded you must unzip the file and you will have an img file.
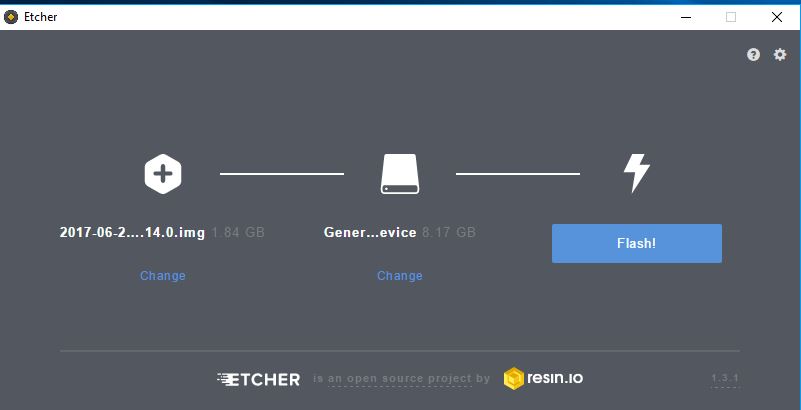
This file is the image of the operating system, to pass the image to the SD card you will need a program called Etcher.
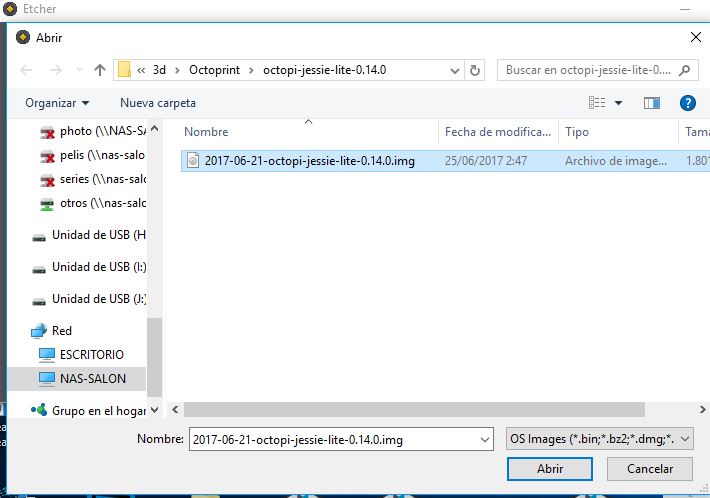
First of all, select the image file.
Then click on “Flash” button
How to made network setup for Octoprint
When the image is transferred to the SD card you must edit a file called “octopi-network.txt” in order to setup Wifi connection. Please, do not edit this file with notepad on Windows or TextEdit on Mac, is better to use notepad++
If you are going to use the Raspberry with a wired LAN this step is not neccesary.
Edit the part of the file that belongs to your WiFi security protocol, ussually is WPA2 as you can see on the acreenshot below: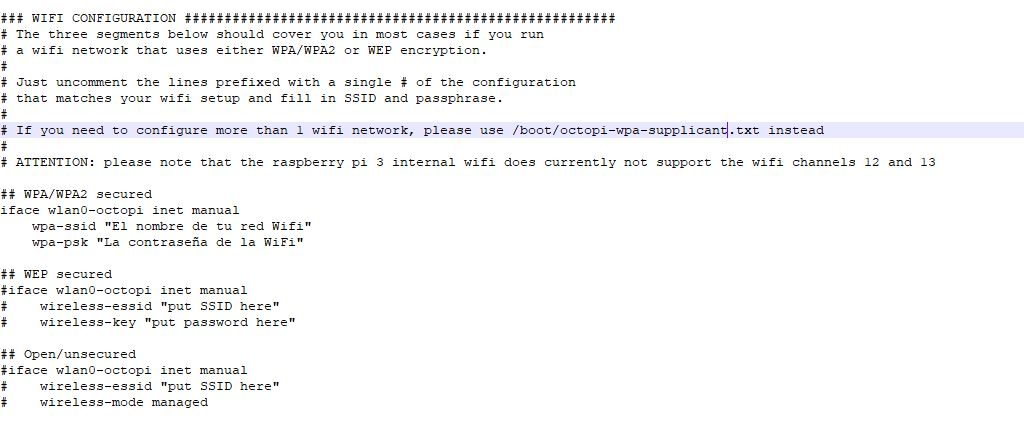
You must delete “#” characters from the beginning of the line in order to uncommnet these lines.
Once done, put SD card on the Raspberry and turn it on.
How to work with Octoprint
If you use Windows you must install Bonjour for printers from Apple.
Once done, you can login from any computer on the same network by putting on a browser http://octopi.local
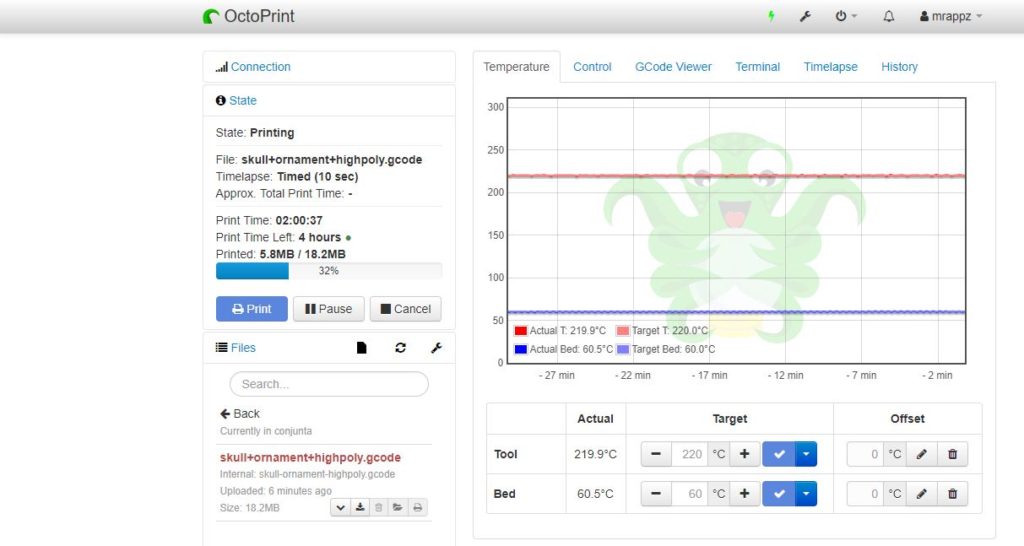
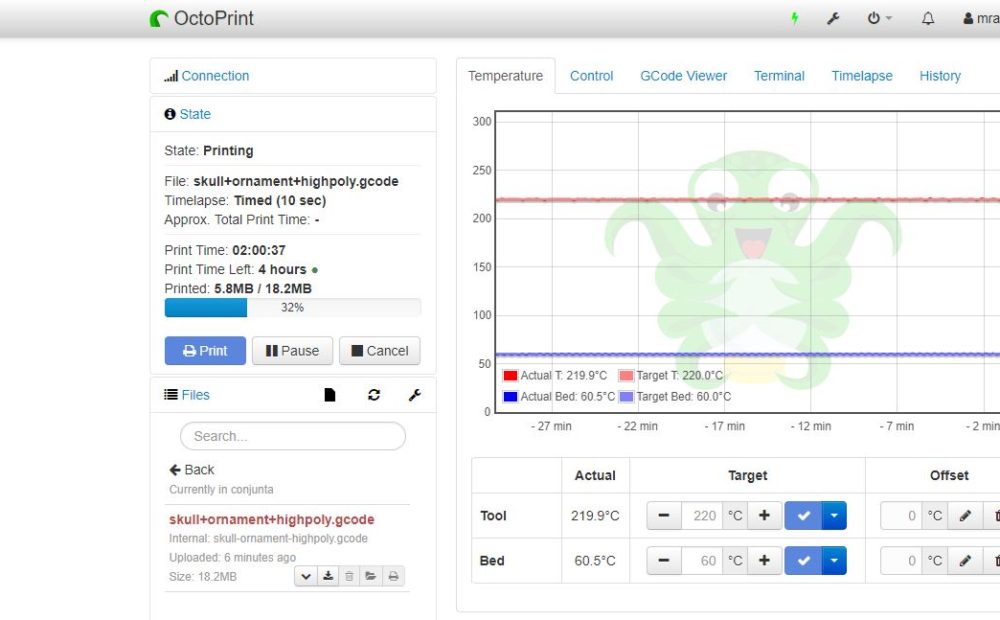
This is the main interface of Octoprint.
You can slice directly with Octoprint, bacuse Cura is installed on it, so if you use Cura on you computer you can add stl directly to Octoprint. In my case I use Simplify 3D, so I slice the stl on my computer and then I drag and drop the gcode file to the browser in order to upload it.
How can I manage the plugins and what must I install?
Go to setup and the go to plugin manager option, as you can see on the image below:
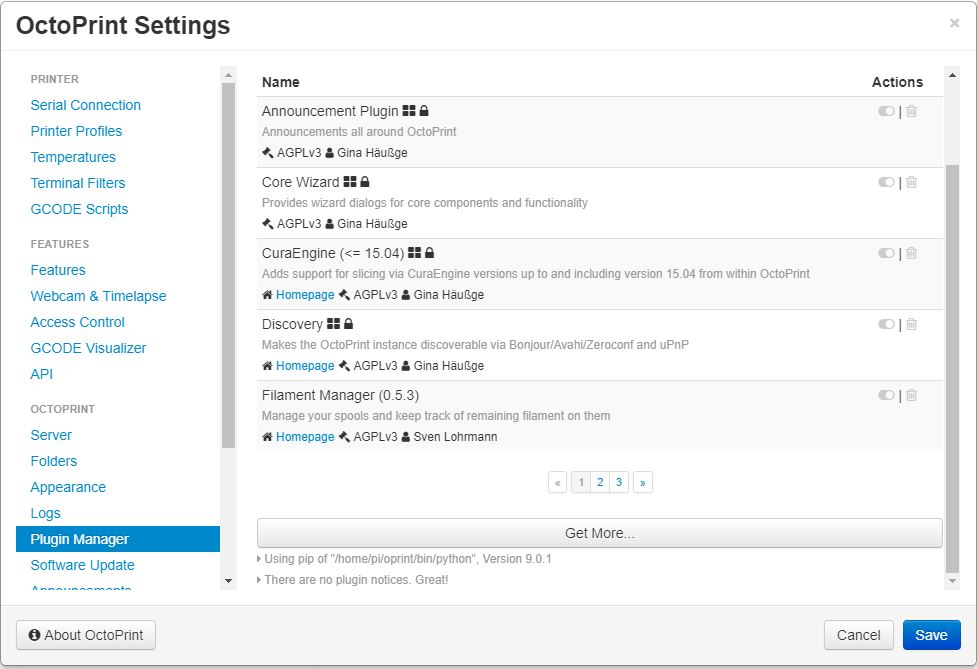
Click on “Get more” button and look for your desired plugins.
I have the following plugins currently installed on my Octoprint:
- Filament Manager -> Is very useful to know how much filament is remaining on the spool.
- Print History Plugin -> Is a log of the things that I have printed and how much time take to print each stl.
- TP-Link Smart Plug -> It allows me to control a intelligent plug in order to turn off the printer remotelly.
- Telegram -> You can create a bot on Telegram in order to have information from the printer.
I hope that in a few days I am going to write the second part of the post, explaining how to access to the printer when you are away from home.