
Today I am going to explain step by step how to install duet WiFi board on your Anet E-10.
The board
Duet WiFi is a high end board, is made on UK and the main features are:
- 32 bits Processor
- TMC 2660 drivers, with 256 microsteps for make the movements smoother
- Integrated WiFi
- Web User Interface
What are the improvements?
- Better management of motor drivers, the current is managed via SW
- Smoother movements on the axis.
- Absolutely silent
- Allows 18 A for heated bed, so the use of MOSFET or relay is not critical.
How to install it?
I am going to explain you in three phases:
Phase 1: Initial configurations
For this phase you only need the board, one USB cable and one computer.
We are going to set up the WiFi module of the board:
- You can download board drivers here , connect the board to the computer via USB and install the drivers if you are asked for them.
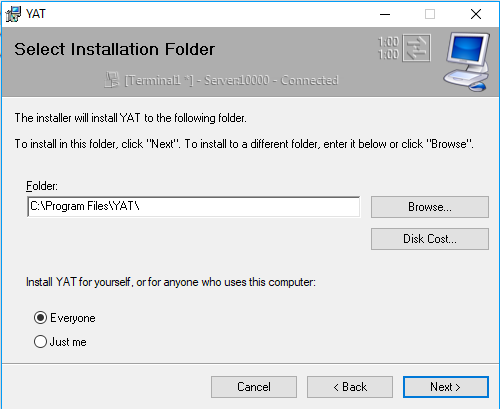
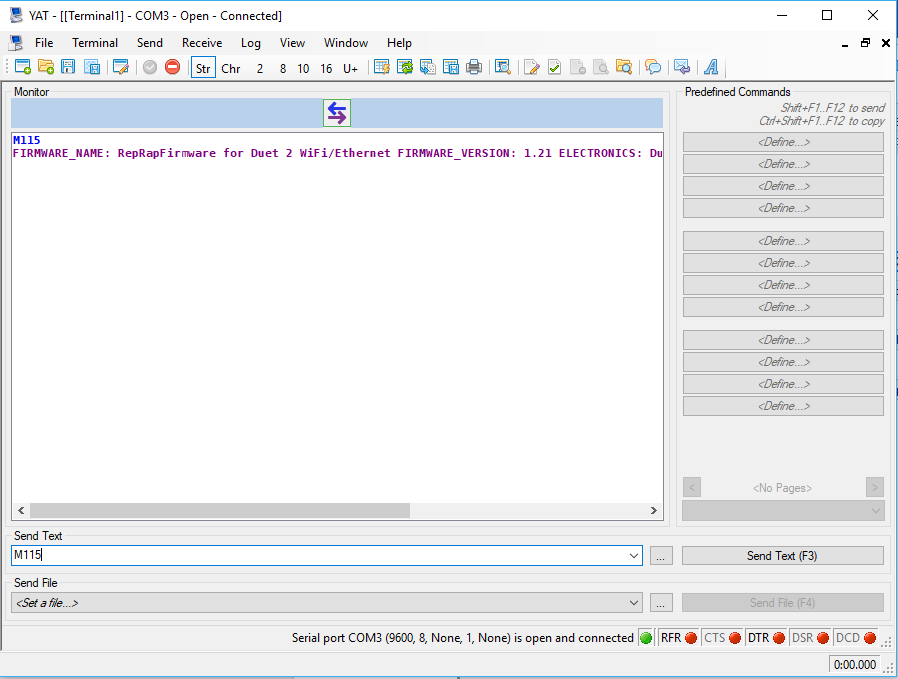
- Download YAT here in order to send commands to the board
- Install YAT with default options

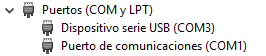
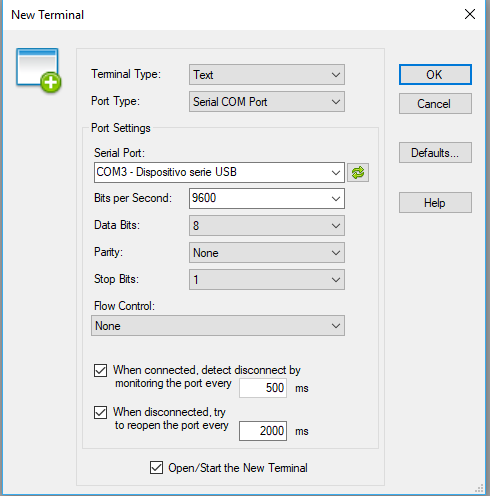
- Then, check the COM port number asigned to serial USB device and setup YAT to work with this port.
- Next you must send GCODE M115 in order to know what is the firmware version installed on SD that comes with the board.
- After that, check WiFi module status using GCODE M552, if the status is idle there is noting else to to, otherwise send command M552 S0

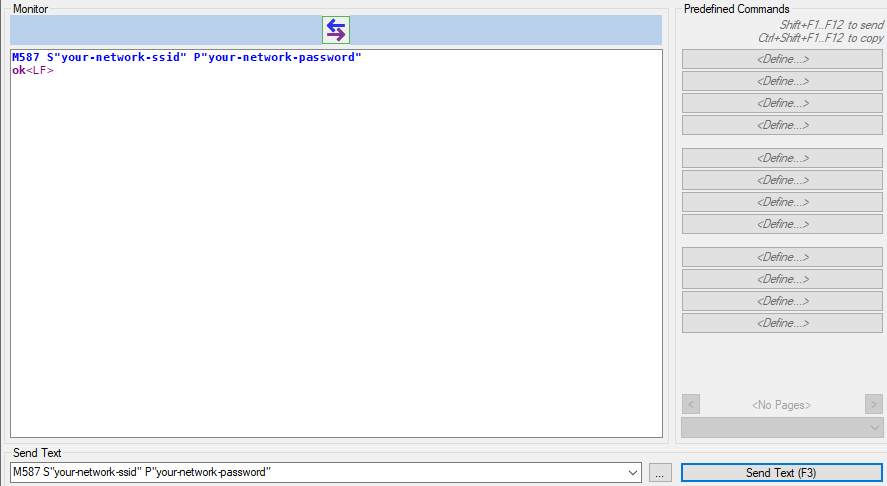
- Next step is set up your board to connect to your WiFi network, is very important, you must configure a 2,4 GHZ WiFi network, because Duet WiFi does not allow 5 Ghz. networks. You must do that via M587 command.
- To connect to you WiFi simply send M552 S1 command.
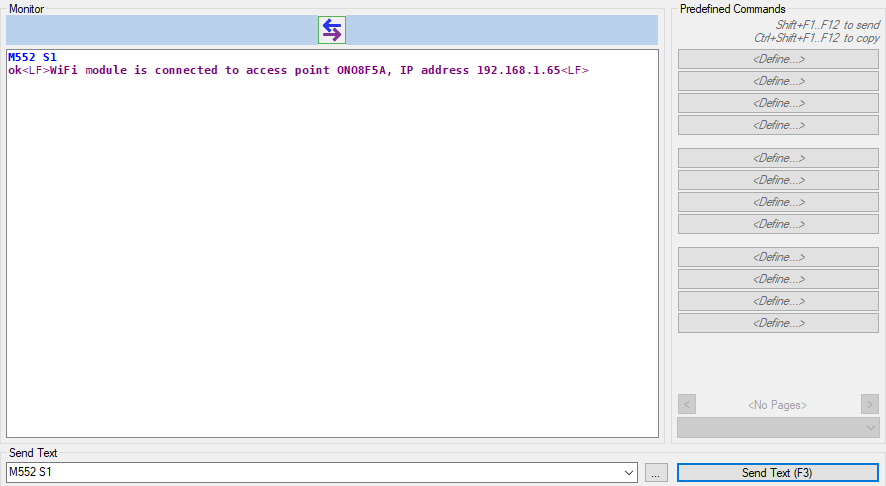
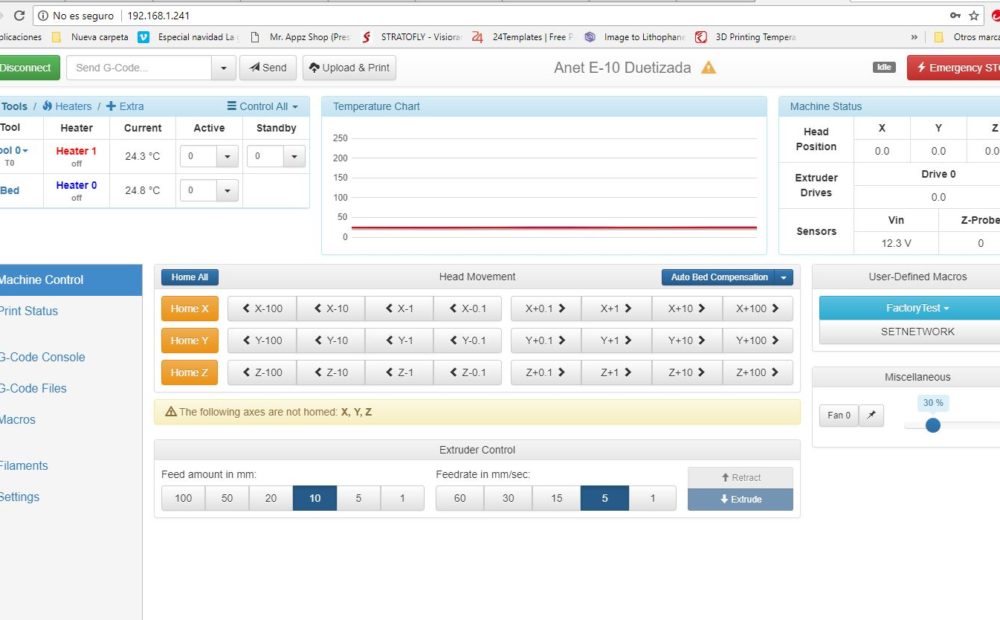
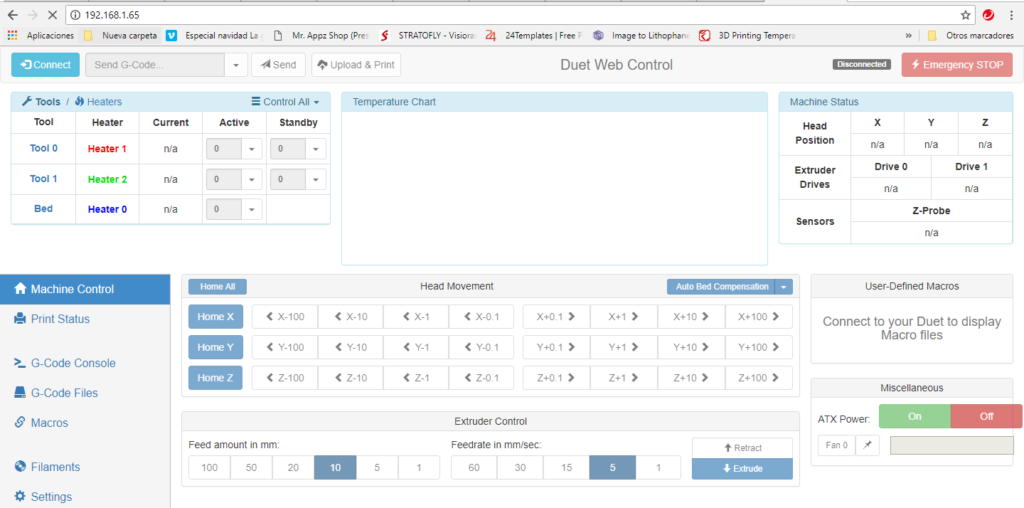
- After that check that you can access to the Duet via browser using the IP address given on the previous step.
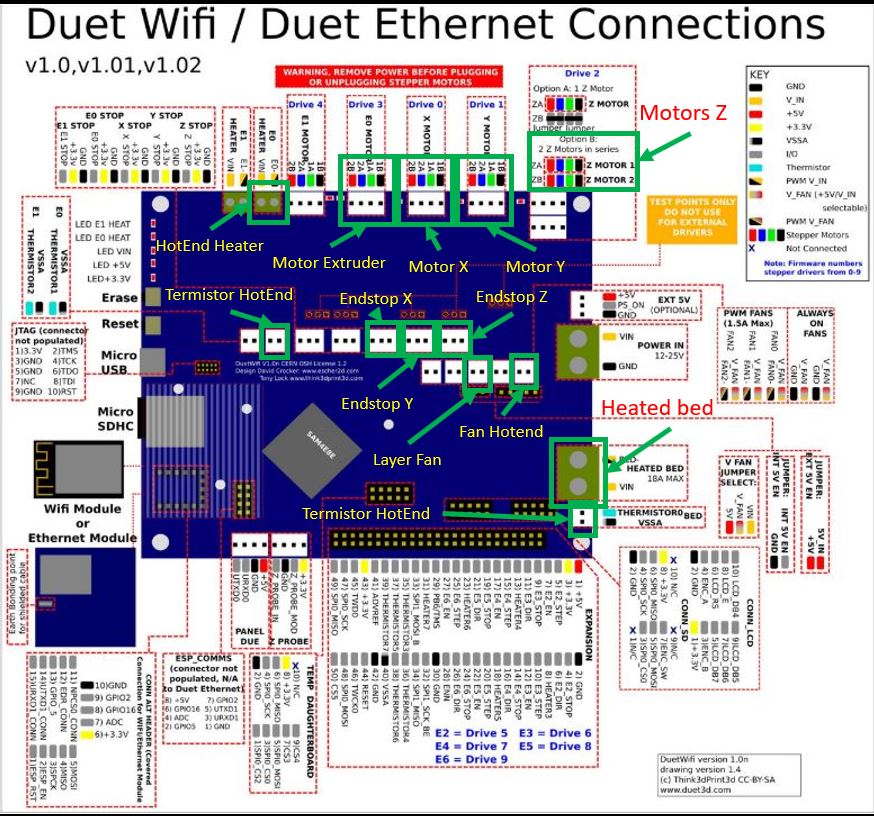
Phase 2: Crimps and cable connections
The connectors on the Anet stock board and GT 2560 are JST type, but Duet WiFi uses Molex connectors. You must crimp the motors plugs (4 cables x 5 motors (X,Y,Z1, Z2 y extruder)), endstop cables (X, Y y Z) axis, termistors wires (cama y hotend) and fan cables (capa y hotend).
Motor cables must be crimped and connected on the following way:

About the enstops you must put tha cables on the left and the right plugs, letting the middle on empty on a 3 pin plug.
Termistors cables are connected on a two pins connector, so there is no problems with them
Finally the fan cables are connected via 2 pins connector, so if you have a fan with three cables you only need to connect the red one and the black one, letting yellow one without connection.
Here you have a diagram explaining how I made the connections.
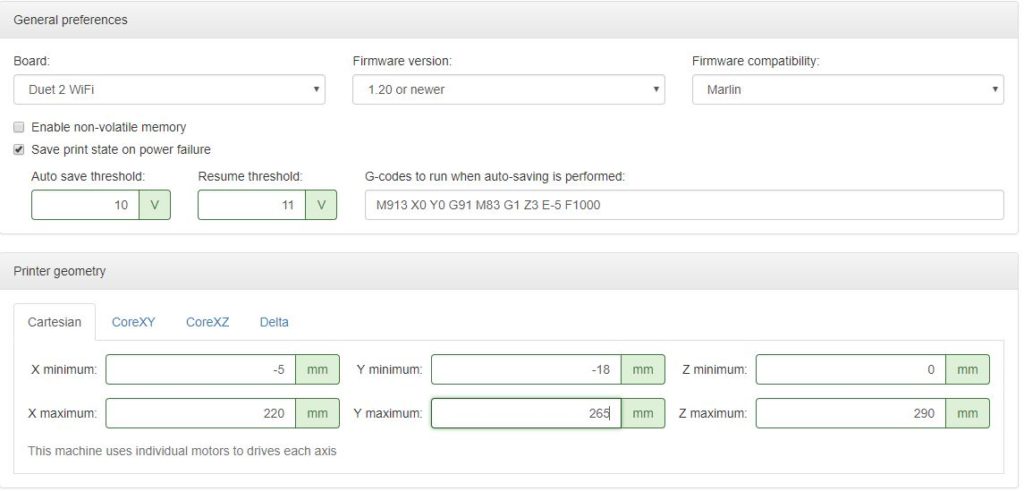
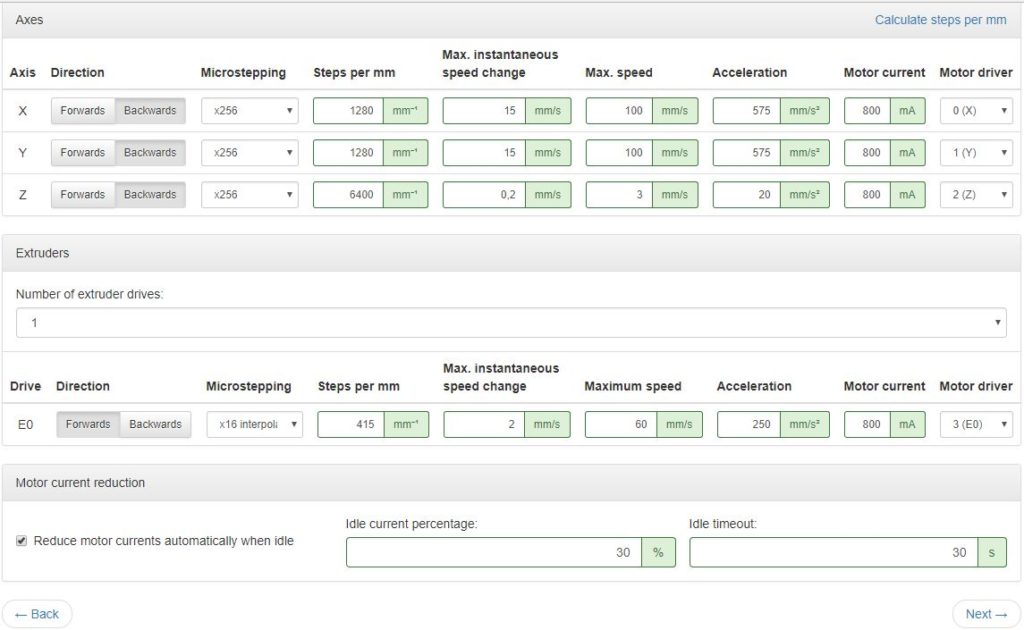
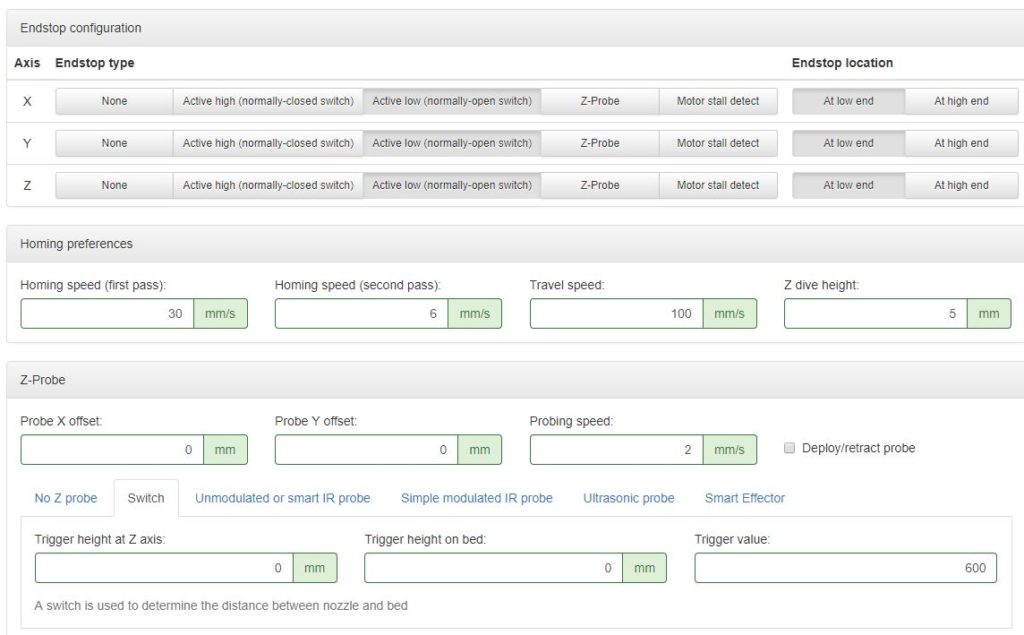
Phase 3: RRF Configuration Tool
You must do the first configuration using the wizard that you can find on this page.
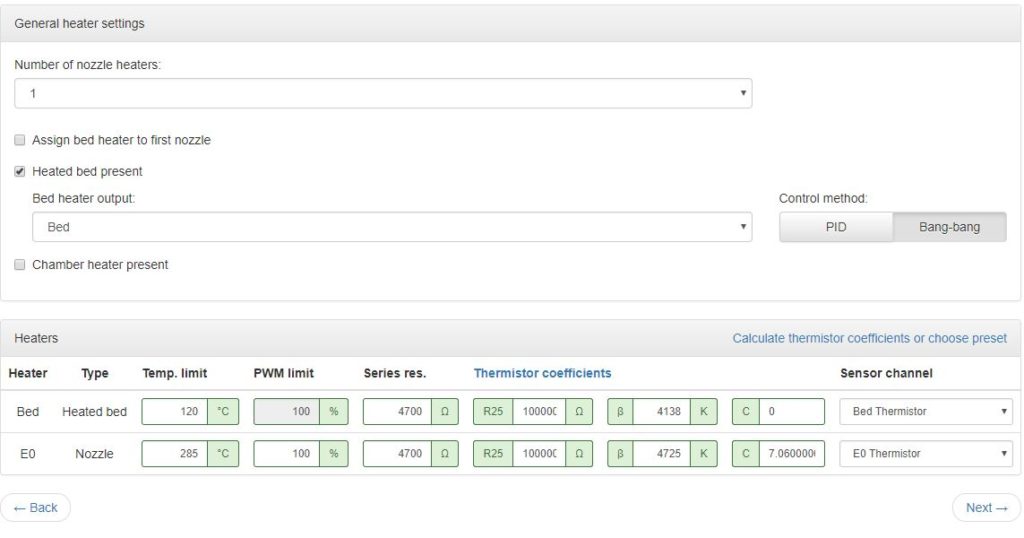
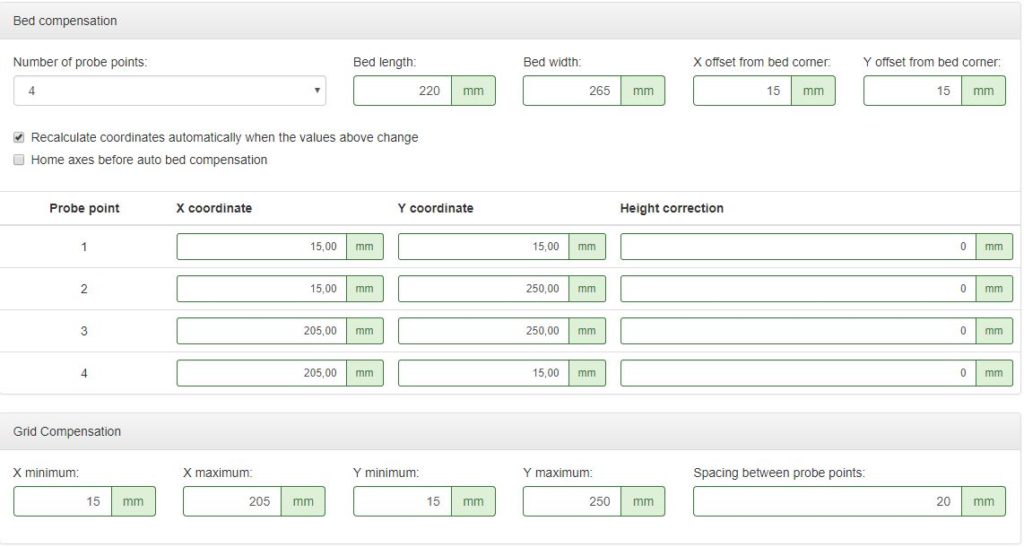
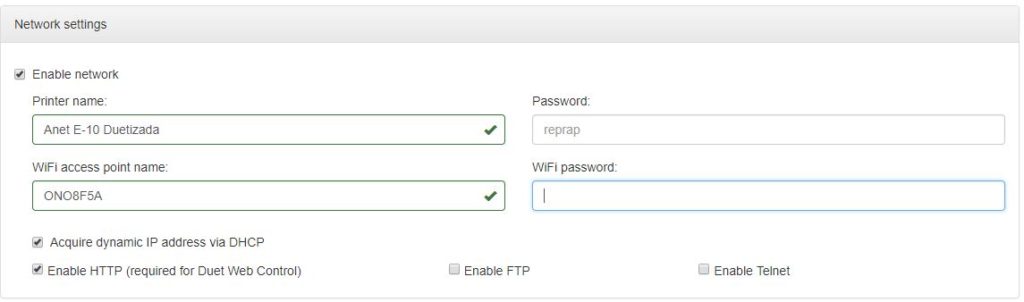
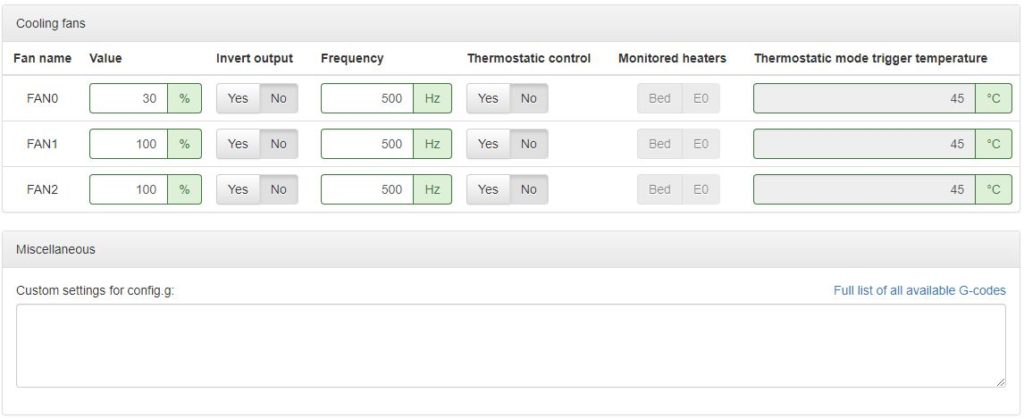
I will put a series of screenshot in order to show you my configuration, but please remind that I have installed Bondtech extruder and E3D original hotend, so, if you does not have this hardware on your machine you must check the extruder motor configuration and the hotend termistor.
- General
- Motors
- Endstops
- Heaters
- Compensation
- Network
- Finish
You are very welcome 🙂