Today I bring you some improvements for Anet E-10, all of them related with Y axis. I have changed the H, that is the support that sustain the heated bed, I also change the heated bed for a silicone one and finally I have added linear guides to Y axis.
New H
The H is a pillar on the Y axis of a cartesian printer, because is the support of the heated bed.
This is the second time that I have changed this piece, because the stock one is awful and is too soft.
The second one was like a rock, but the weight is too high, almost 500 grams, so the inertial movements were huge and ghosting appeared.

The new H´s weight is only 100 grams, so the weight reduction is huge.
Silicone heated bed
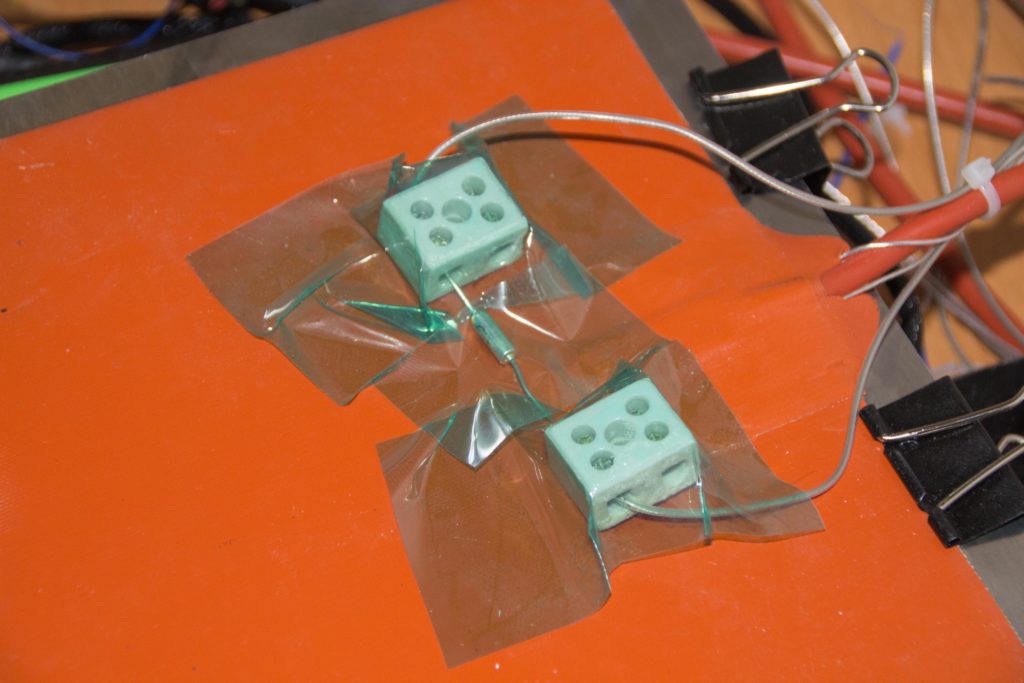
This is a major change, because is a terrific improvement in term of time need to heat the heated bed.
To connect the 220V to the printer you need a SSR (Solid State Relay). The relay will open or close the electrical circuit of the bed following the instructions given by the printer electronics.
You must connect the relay with your board trough the heat bed plugs on the board, like you do with a 12V heated bed.
You can see a wiring diagram (only in spanish sorry) that I found here:
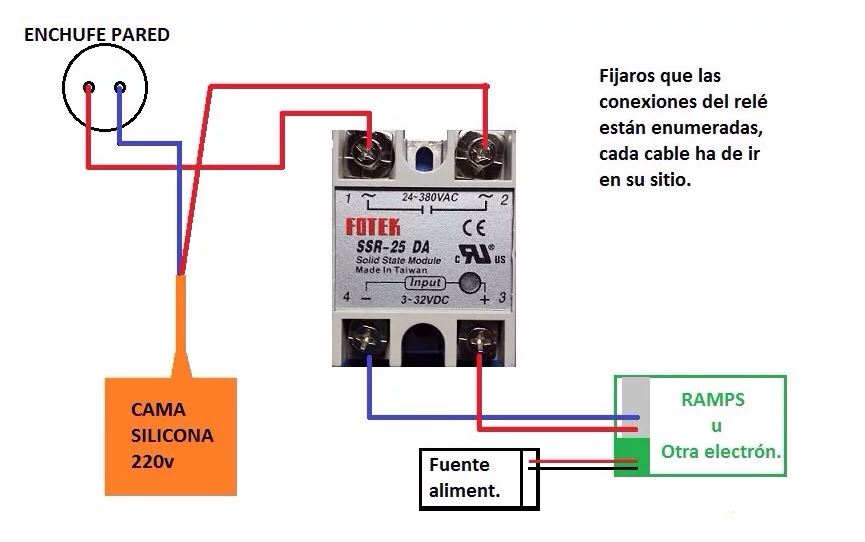
In addition to that I put double physical security:
- The plug that goes to 220V have a switch, so I can cut the circuit when I want.
- In the red wire on the previous schema, I have added one thermal fuse, and if the heated bed reach 133ºC the fuse will break and the circuit will be open. Important advice: Please use ceramic connectors, because tha plastic ones melts at 70ºC.
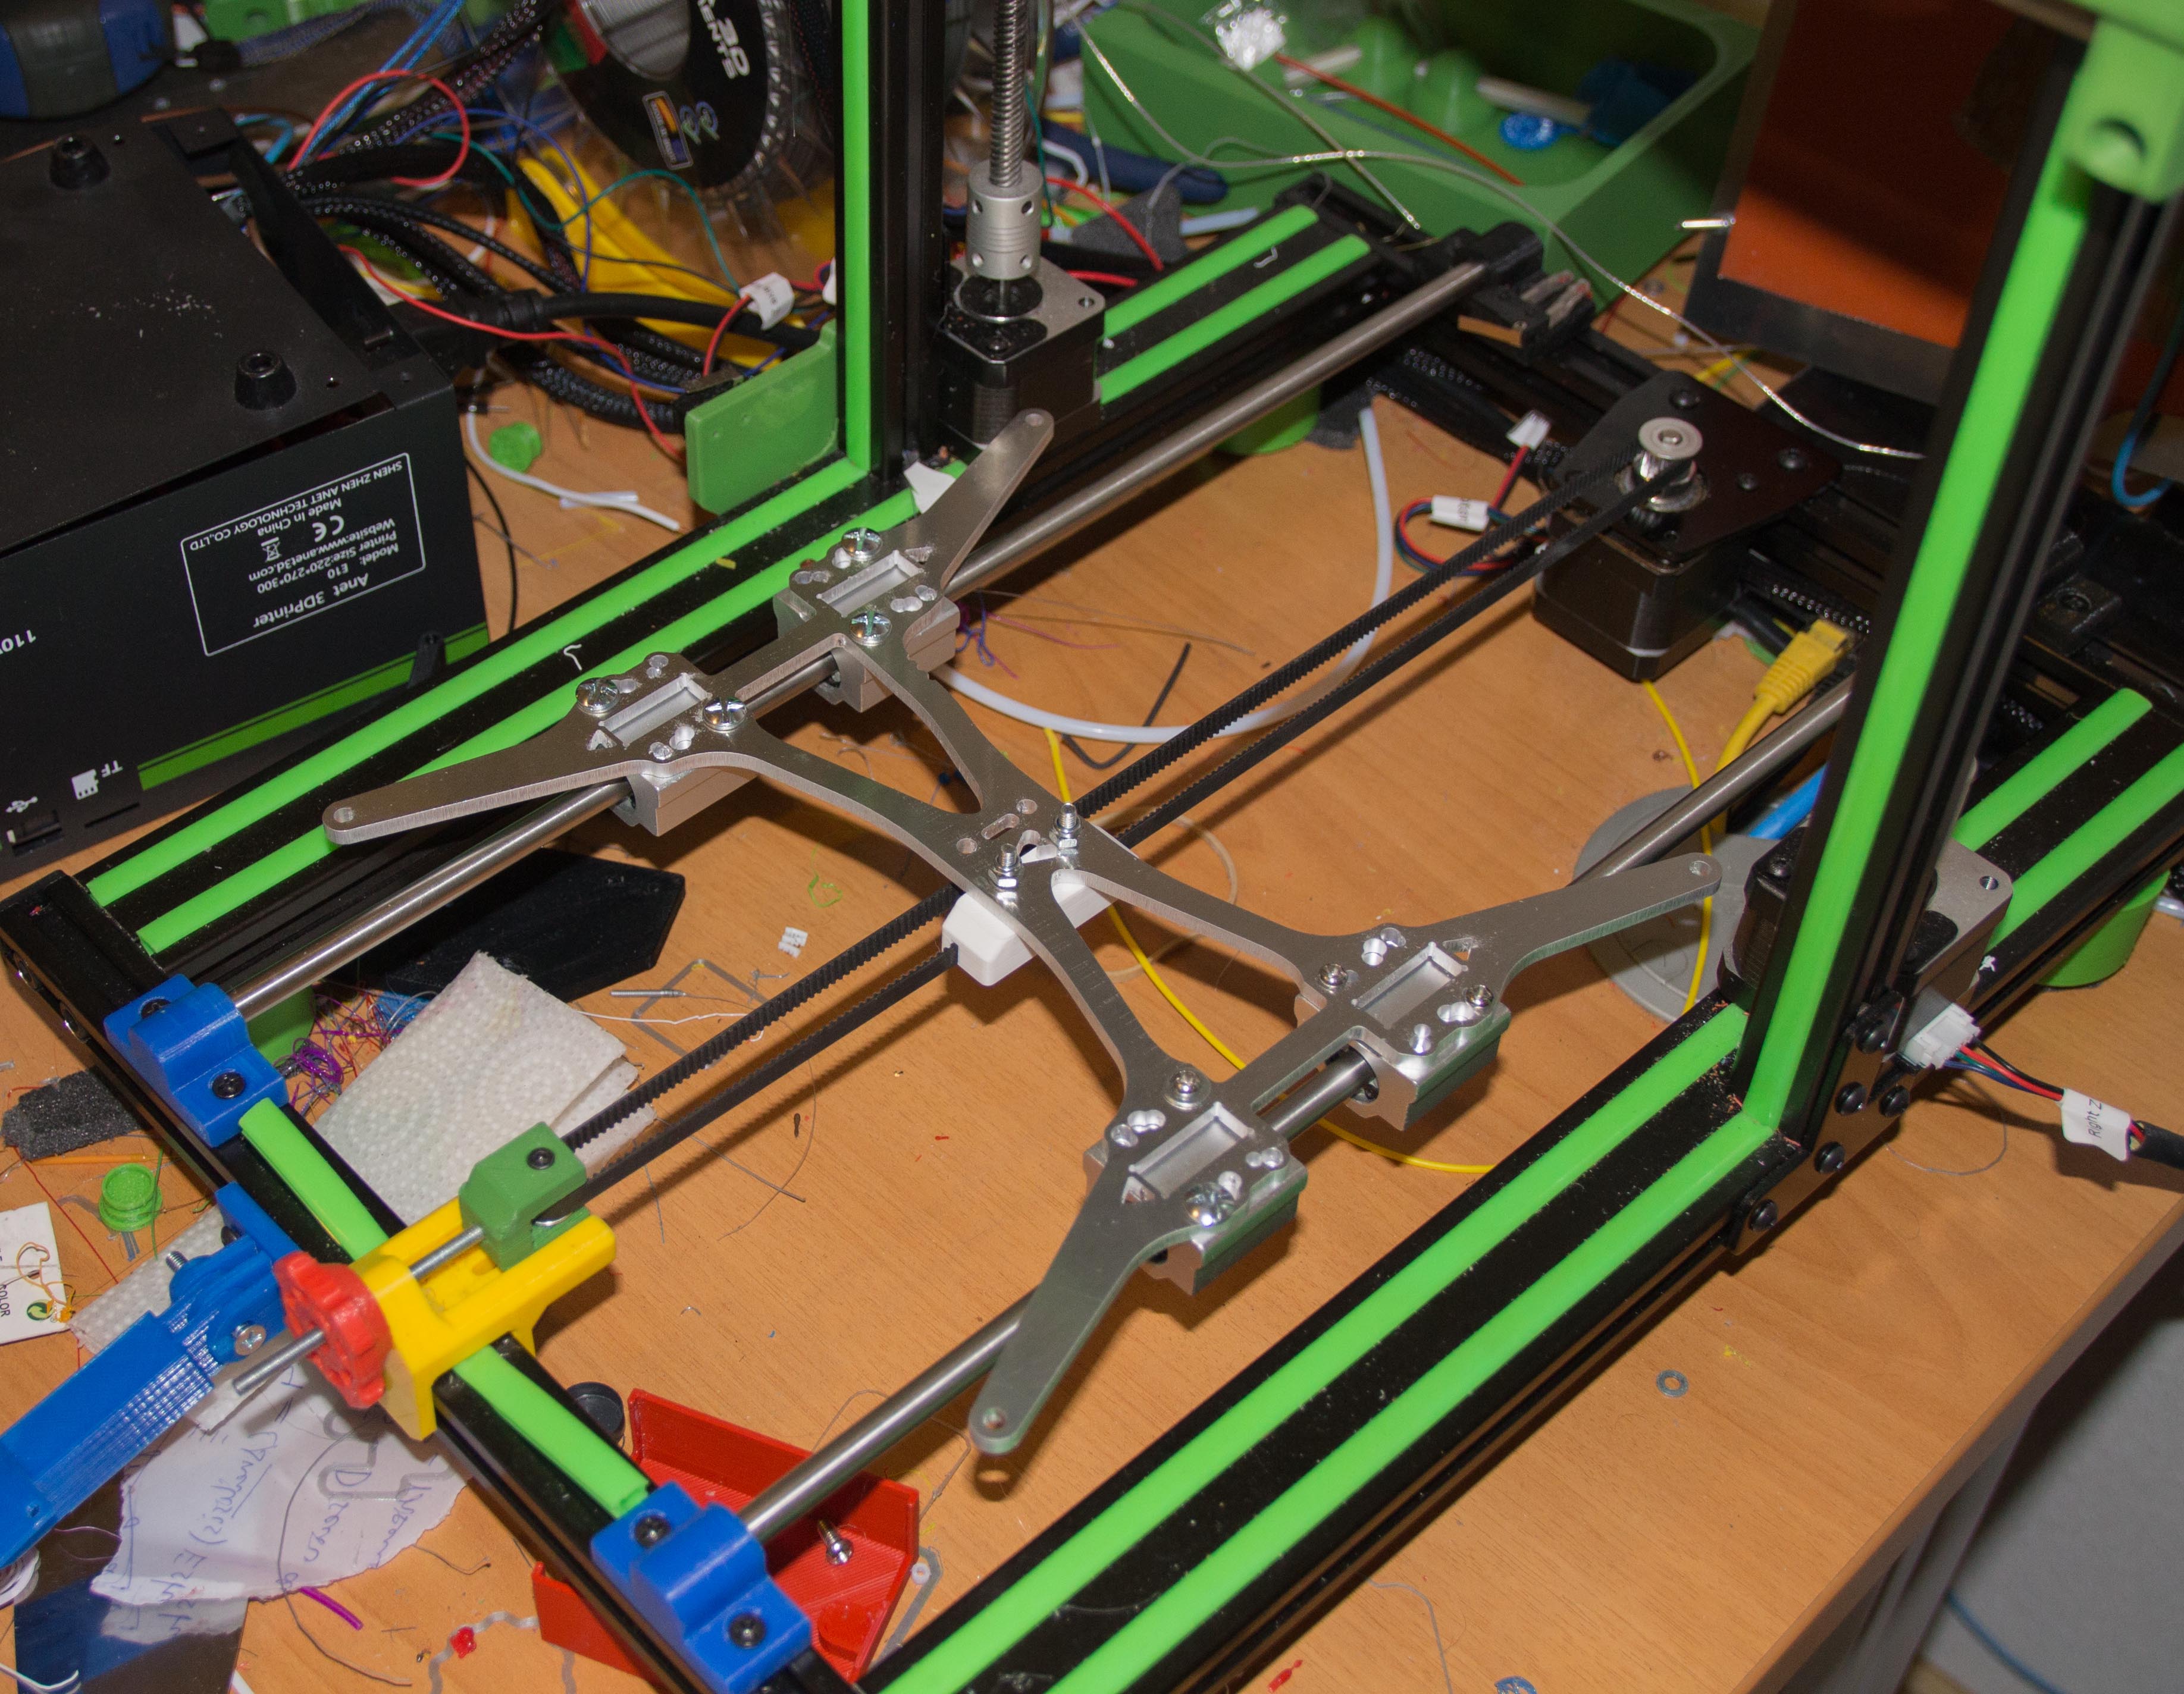
Y axis total renewal: Linear Guides
This is a fundamental change to avoid ghosting on my printings.
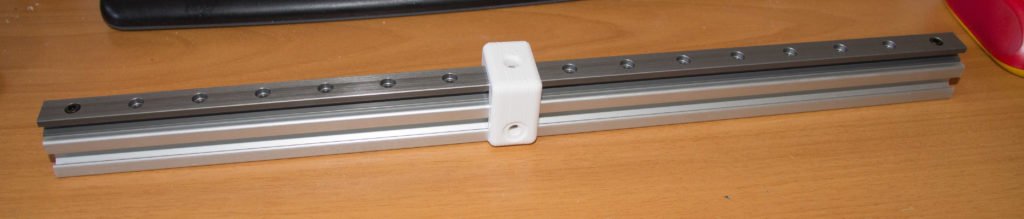
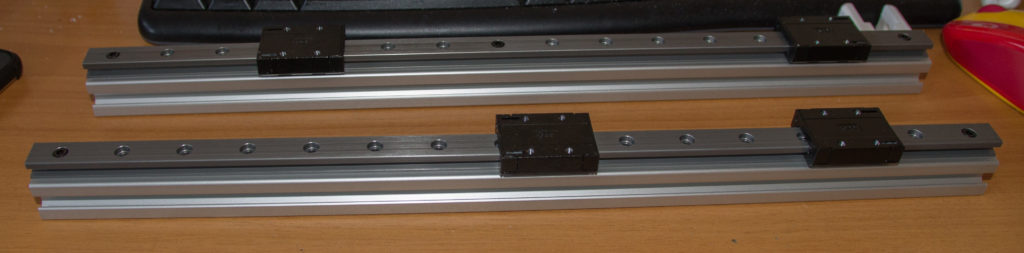
To commit this change I have bought a couple of 2020 extrusion profiles here and IGUS linear guides of 12 mm. The profile and rails have a length of 400 mm. The are two carriage blocks on each rail.
You must follow the following instructions:
- You must join the profile and the rail, for do that you must use some t-nuts and some M3 8 mm screws and use this piece, designed by Félix on E-10 telegram group, to align them

- After that mount the carriage blocks but as loose as you can.

- The next step is mouting the linear guides on the printer, you must leave 20 mm between the original profile and the new one. To make this adjustment easily, remove the feet of the printer.

- Check that the movement is smooth and then tighten the carriage blocks.
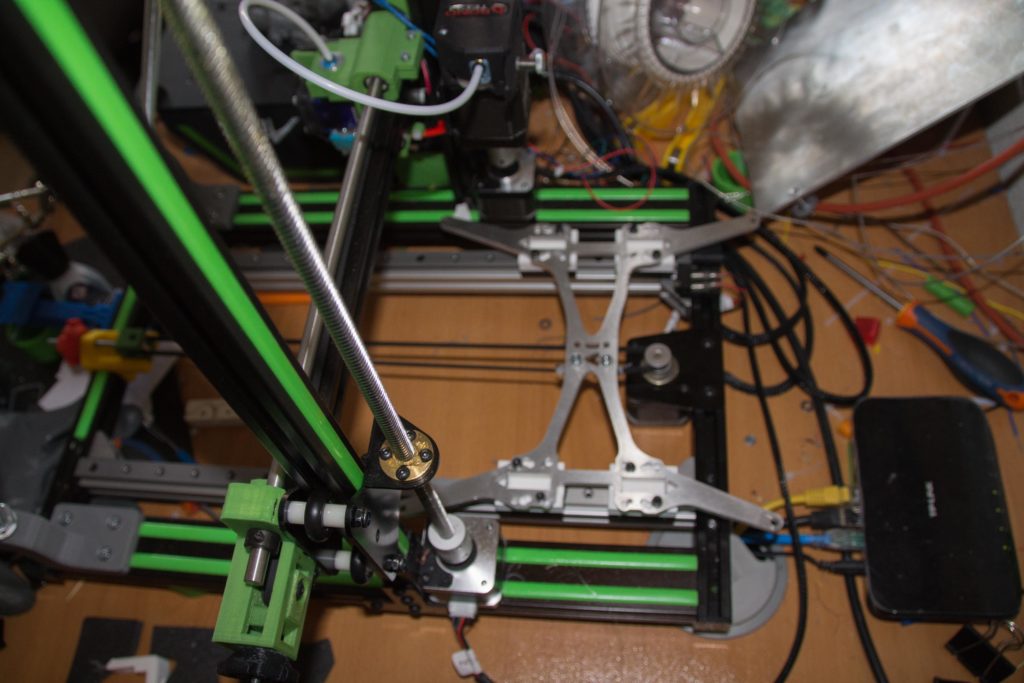
In addition to that I modified the tensor for Y axis, in order to add a 20 teeth pulley with a bore of 3mm to get a better synchronization.
You can find the modified tensor here.